Why Chocolate Cake Belongs on a Southern Table
Chocolate cake is the kind of dessert that makes an ordinary supper feel like an occasion. It is welcome at birthdays and church gatherings, but it is just as fitting on a Sunday sideboard beside a pot of coffee. This version follows the generous spirit of Southern home baking: familiar pantry ingredients, clear technique, and enough frosting to make every slice feel special. The cake is dark and chocolatey without being heavy, while buttermilk keeps the crumb tender and gives the sweetness a gentle tang.
This is a fan-created, Southern-inspired recipe rather than an official Brenda Gantt recipe. Its appeal comes from the same practical idea that guides good home cooking: understand what each ingredient contributes, pay attention to the food instead of relying only on a timer, and share the result while it is at its best. Even a first-time layer-cake baker can succeed when the work is divided into simple stages.
The Ingredients That Build a Moist Crumb
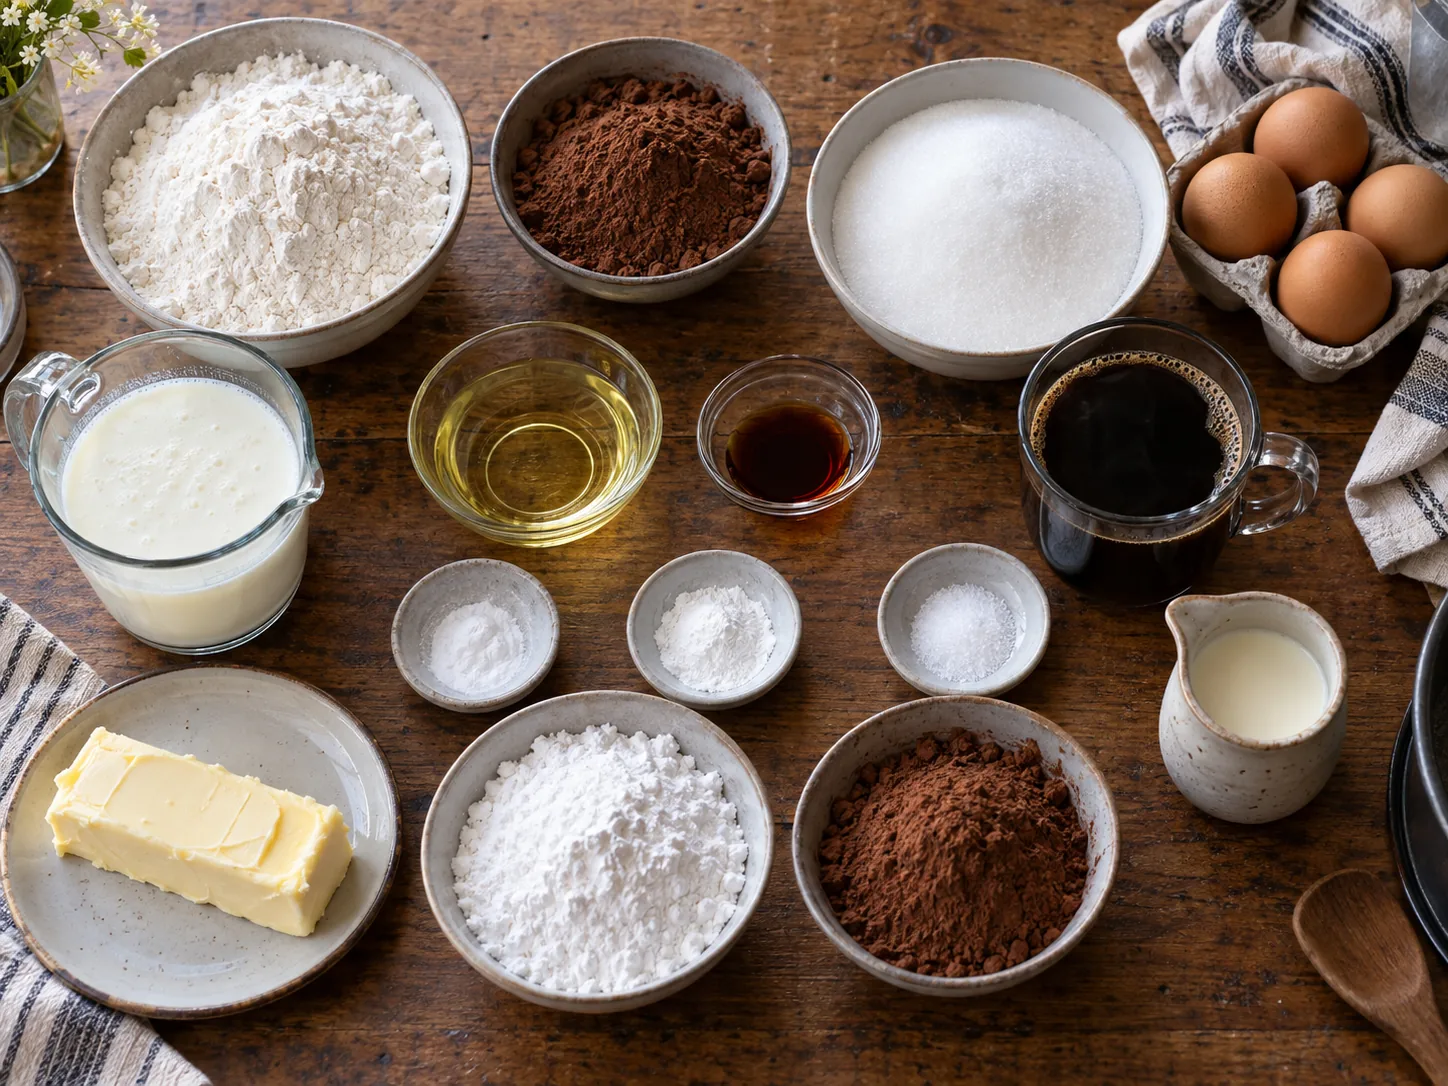
Natural unsweetened cocoa gives the cake its classic flavor and works with the baking soda in the batter. Cocoa can compact during storage, so spoon it into the measuring cup and level it rather than scooping hard from the container. If it is lumpy, sift it with the flour. All-purpose flour supplies enough structure for two sturdy layers, but too much flour makes cake dry; weighing or using the spoon-and-level method is worth the extra minute.
Oil, rather than melted butter, is responsible for much of the cake's lasting softness. Butter is wonderful in the frosting, where its flavor can be appreciated, while a neutral vegetable oil stays fluid at room temperature and keeps the crumb supple even after refrigeration. Buttermilk adds moisture and acidity. Room-temperature eggs and buttermilk combine more readily with the oil, helping the batter bake evenly instead of forming dense patches.
Why Hot Coffee Makes Chocolate Taste Deeper
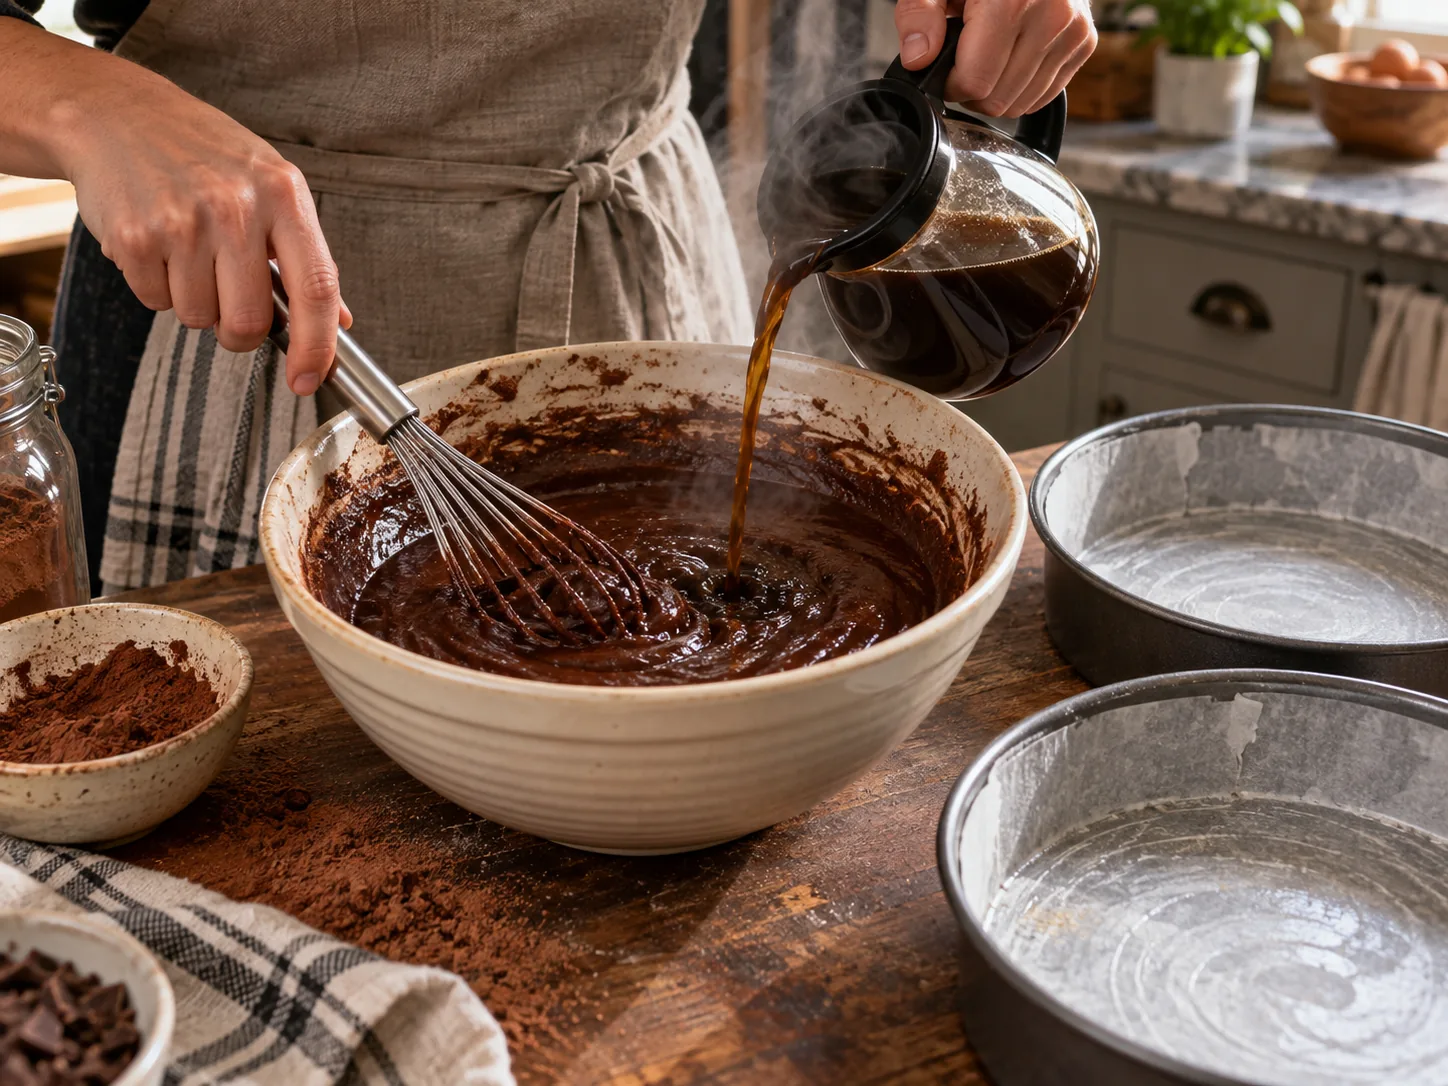
The cup of hot coffee is not meant to turn this into a coffee-flavored cake. Heat wakes up, or “blooms,” the cocoa so its roasted aroma becomes fuller; coffee quietly reinforces those same dark notes. Use freshly brewed, strong black coffee and pour it in gradually while whisking. If coffee is not available, hot water will still bloom the cocoa, though the finished flavor will be a little less complex.
Do not be alarmed when the batter becomes much thinner than a typical butter cake batter. That fluid consistency allows moisture to move through the crumb as it bakes. Scrape the bottom and sides of the bowl once, making certain no pale flour pockets remain, but stop mixing as soon as the batter is uniform. Prolonged beating develops gluten and can turn a tender cake springy or tough.
Prepare the Pans Before Mixing
Once baking soda meets acidic buttermilk, the leavening begins working. Have the oven fully heated and two 9-inch round pans ready before combining wet and dry ingredients. Grease the pans, place a parchment circle in each bottom, and grease the paper lightly. This small safeguard makes release much more dependable. Divide the batter evenly; a kitchen scale is useful, but judging by the level in each pan also works.
Bake the pans on the center rack with a little space between them so hot air can circulate. Avoid opening the oven during the first 22 minutes, when the delicate structure is still setting. Start checking at 28 minutes. The center should spring back after a light touch, the edges may just begin to pull from the pan, and a wooden pick should show a few moist crumbs—not wet batter and not necessarily come out perfectly clean.
Cooling Is Part of the Recipe
Let the layers stand in their pans for about 15 minutes. Turning them out immediately can cause a warm, fragile cake to break; leaving them in the pans until cold can trap steam and make the surface sticky. Run a thin knife around the edges, invert onto racks, remove the parchment, and turn the cakes right side up. Frost only when they are completely cool. Even slight warmth melts buttercream and encourages layers to slide.
For easier decorating, the cooled layers can be wrapped and chilled for 30 minutes. A cold cake sheds fewer crumbs. If a layer domes noticeably, trim the crown with a long serrated knife, using gentle sawing motions. Save those scraps for the cook—they are also a useful preview of the crumb and flavor.
Chocolate Buttercream Without the Fuss
Softened butter should yield to a fingertip but should not look shiny or oily. Beat it first until smooth, then add sifted confectioners' sugar, cocoa, and salt on low speed. Alternating the dry mixture with cream prevents a cocoa cloud and helps control the texture. Once incorporated, add vanilla and beat briefly at medium speed until light. Too stiff? Add cream one teaspoon at a time. Too loose? Add a few spoonfuls of confectioners' sugar or chill it for ten minutes.
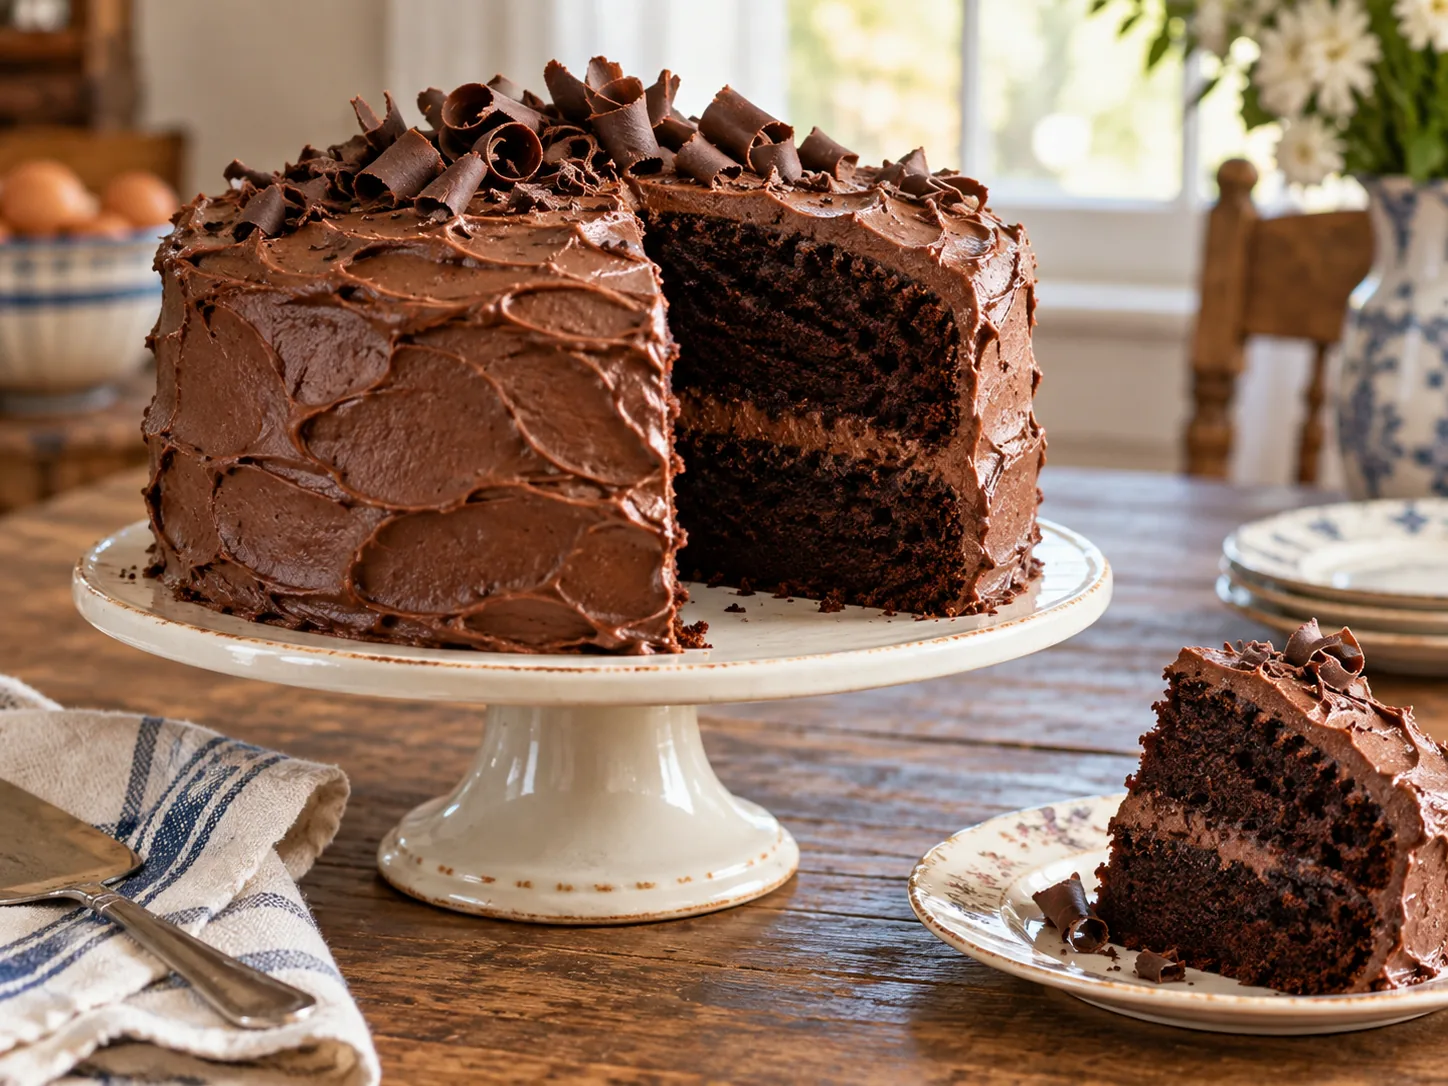
Place the first cake layer on a plate with the flatter side facing up. Spread a level layer of frosting almost to the edge, add the second layer, then apply a thin “crumb coat” over the entire cake. Chill for 15 minutes if your kitchen is warm before adding the remaining frosting. Rustic spoon swirls suit this cake beautifully and require no piping bag. A few chocolate curls are optional; the glossy, hand-finished frosting is inviting on its own.
Common Chocolate Cake Problems
A sunken center usually means the oven door opened too early, the cake was underbaked, or the leaveners were measured generously. Dry edges often point to an over-hot oven or dark pans, which absorb more heat; begin checking early and use an inexpensive oven thermometer if results are inconsistent. A dense line near the bottom can come from cold ingredients, overmixing, or letting the mixed batter wait too long before baking.
If the layers stick, set the pan over a warm, damp towel for a minute and try again rather than prying aggressively. If a cake cracks, buttercream is an excellent repair tool. Position the damaged side inward, fill any gap with frosting, and continue. A homemade layer cake does not need geometric perfection to be delicious or welcoming.
Serving Ideas
Use a thin, sharp knife dipped in hot water and wiped dry between cuts for tidy slices. The cake is rich enough to stand alone, especially with coffee or cold milk. Fresh strawberries or raspberries add brightness, while a modest scoop of vanilla ice cream makes a celebratory dessert. Allow a refrigerated cake to sit at room temperature for 30 to 45 minutes before serving so the crumb softens and the buttercream becomes creamy again.
Make It Your Own
For a sheet cake, bake the batter in a greased and lined 9-by-13-inch pan, beginning to check at about 32 minutes. Cupcakes generally need 18 to 22 minutes and should be filled only about two-thirds full. Add a teaspoon of espresso powder for a darker flavor, or stir finely grated orange zest into the frosting for a fresh variation. Keep the core ratio unchanged the first time; after learning the batter's consistency, small flavor changes are easy to judge.
Make-Ahead and Storage
The unfrosted layers may be baked one day ahead, cooled fully, wrapped tightly, and kept at room temperature. They can also be frozen for up to two months; wrap each layer in plastic and foil, then thaw while still wrapped so condensation stays outside the cake. Buttercream can be refrigerated for up to five days. Bring it back to room temperature and beat briefly before using.
Keep the assembled cake in a covered cake carrier for up to two days in a cool room. In hot or humid weather, refrigerate it for up to five days, protecting cut surfaces with plastic wrap. Individual slices freeze well in airtight containers. Thaw overnight in the refrigerator and let them lose their chill before serving. Thoughtful wrapping matters because exposed cake quickly absorbs refrigerator odors and loses moisture.
Jump-to-Recipe Card
Ingredients
- For the cake:
- 2 cups all-purpose flour, spooned and leveled
- 1 3/4 cups granulated sugar
- 3/4 cup natural unsweetened cocoa powder
- 2 teaspoons baking soda
- 1 teaspoon baking powder
- 1 teaspoon fine salt
- 2 large eggs, room temperature
- 1 cup buttermilk, room temperature
- 1/2 cup neutral vegetable oil
- 2 teaspoons vanilla extract
- 1 cup hot strong black coffee
- For the chocolate buttercream:
- 1 cup unsalted butter, softened
- 3 1/2 cups confectioners' sugar, sifted
- 2/3 cup natural unsweetened cocoa powder
- 1/3 cup heavy cream or whole milk, plus more as needed
- 2 teaspoons vanilla extract
- 1/4 teaspoon fine salt
Instructions
- Heat the oven to 350°F. Grease two 9-inch round cake pans, line the bottoms with parchment, then lightly grease the paper.
- In a large bowl, whisk flour, sugar, cocoa, baking soda, baking powder, and salt until evenly combined and free of cocoa lumps.
- In another bowl, whisk eggs, buttermilk, oil, and vanilla. Pour the wet mixture into the dry ingredients and mix just until no dry flour remains.
- Slowly pour in the hot coffee while whisking. The batter will be thin. Scrape the bowl once and divide the batter evenly between the pans.
- Bake for 28 to 32 minutes, until the centers spring back and a tester has a few moist crumbs. Cool in the pans 15 minutes, turn onto racks, remove parchment, and cool completely.
- For the frosting, beat butter until creamy. On low speed, add confectioners' sugar, cocoa, and salt, alternating with cream. Add vanilla and beat until fluffy and spreadable.
- Spread frosting over the first layer, add the second, then frost the top and sides. Let the cake rest about 20 minutes before cutting into 12 slices.
Calculate
Calculate
Calculate
Calculate
Nutrition values should be calculated from the final tested recipe quantities before publication.